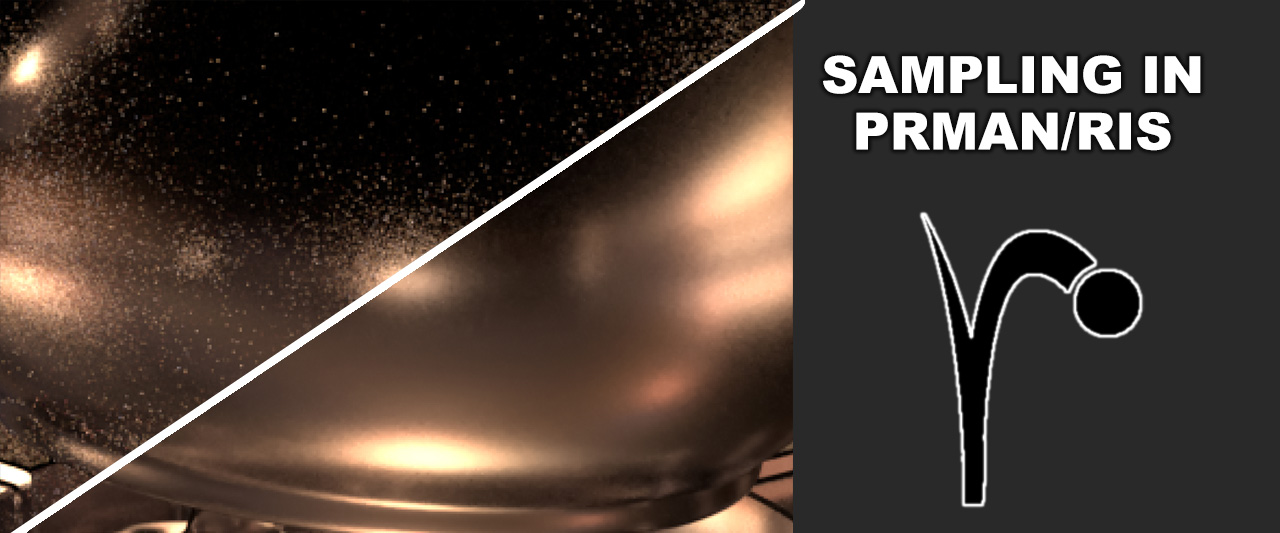
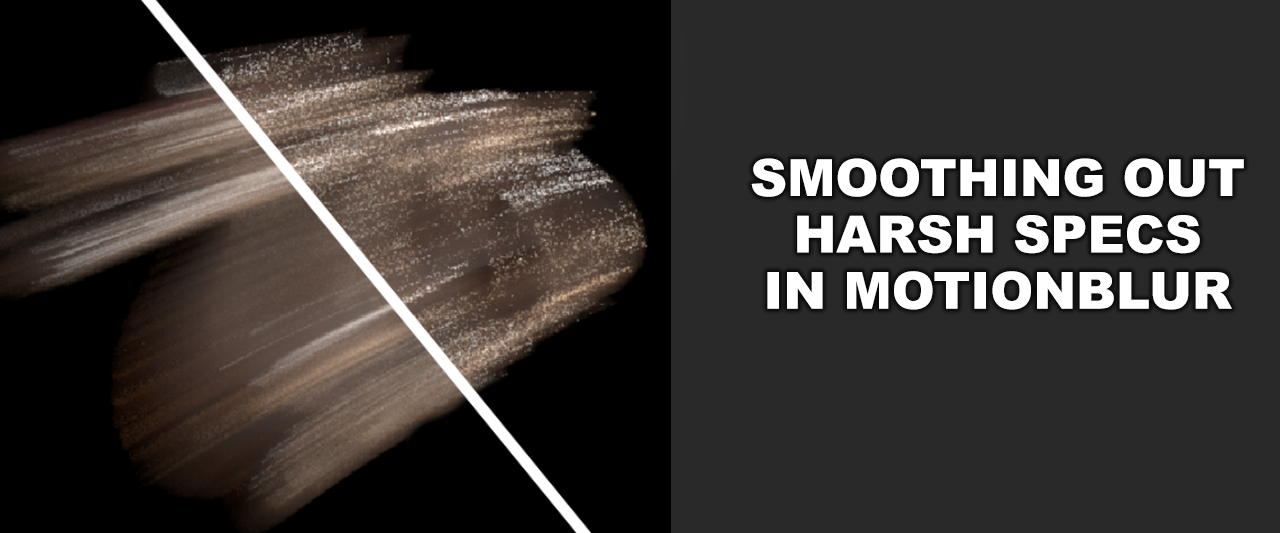
One of the worst things to sample for any brute-force ray tracer are specular highlights / reflections with a low roughness in motion blur. Even worse so on fine displacements or bump. And EVEN more worse with lots of small highlights. When all of these things come together sampling these highlights in motionblur is going to become really hard and with conventional methods you will end up having to rely on extemely high AA samples and even then the highlight-streaks will most likely still be dotty… And you won’t make any friends if they have to paint these streaks smooth in Comp :) So during the crunch time of a recent project I was brain storming with some of my collegues how this could potentially be fixed without needing too much samples and I’ve been working on implementing that idea which seems to work quite nicely.
The new RIS mode introduced in RenderMan 19 is a completely new render-engine that is very different from REYES. Being a brute force path tracer (uni- and bidirectional modes) it works much more like other renderers that follow a similar approach (e.g. Arnold). That approach aims to make the render process more simple and interactive. And while I personally don’t like it completely yet it seems to get widely adopted in the film industry and we all have to adjust to it sooner or later :)
In the process of trying to streamline things a bit more in my day-to-day workflow I have recently been working on a hand-full of small helper tools. One of them is a small set of scripts that handle the conversion of a selection of files to Arnold & RenderMan’s native .tx/.tex files from the filebrowser… because people like the GUI, right? :)
One of the great things about Katana is the ability to have a simple compositor right within your lighting/lookdev environment. I have been using its 2D features more or less extensively throughout the last couple of projects. It’s quite handy to tweak your HDR that you’re using right before you plug it into an environment light, without the need to go into Nuke again if you’re doing just smaller tweaks. Unfortunately Katana’s 2D interface lacks quite a few things that would make it a valueable alternative to Nuke for preparation tasks, because you have to wire more things together. So I was working on a few ‘gizmos’ to make the process a bit less cumbersome.
Integrating CG into uneven soil is an interesting challenge. On a recent show we had to integrate CG characters into plates which often had a grassy ground. For Comp it’s benefitial if you get masks from Rendering to aid the blending of the CG elements into the grass. If the ground the characters are walking on is flat this can easily be achieved with a standard PWorld AOV. It get’s a bit trickier though if the characters are walking up a hill or a similarly uneven surface, because the coordinates at which the character comes in contact with the ground are constantly changing. I’ve been trying to come up with a system to make a Comper’s life easier and found a relatively simple solution.
Image based lighting often times simplifies getting started with a good lighting setup when trying to integrate CG into life action. Often times it’s beneficial to have the IBL sphere to just contain the ambient lights from the environment and therefore to paint out any actual light sources from the set. Those can then be used on separate lights to give the main illumination from the set lights, while the IBL sphere contributes ambient environment light. Now, if you have a lot of different environments and consequently a lot of different HDR’s it can be tedious to paint out the lights and output them after that…
Primitive Variables are a really cool way to get variation in Renderman Shading Networks. As it requires adding Attributes to your Shape Nodes within Maya to control the variation it can be quite time consuming to set it up. So I was trying an attempt to build an interface that helps a bit with the set up.
CG fur always has the tendency to look very clean and soft. To break up the structure and to give a bit more realism I like to mix it with a bit of dirt, e.g. some leafs or sticks in the fur of a character walking through the woods. Here’s a quick rundown on what I’m doing to achieve this using Yeti and Renderman within Maya.
To render more efficiently and to get some particular features working one has to feed Renderman with .tex files. Most regular image files can be converted to .tex files with the txmake executable that comes with RPS. However converting multiple files such as UDIM’s from Mari can be time consuming. So let’s make things a bit quicker… :)