Nuke makes it really easy to access metadata from incoming images. You can easily access information from pictures that you shot with your camera or access render stats from CG renderings. This can prove to be really useful in a production environment where you want to make sure that your frames are rendering in a reasonable time without consuming too much memory. This example shows how to access and display that information in Nuke with renderings from Arnold.
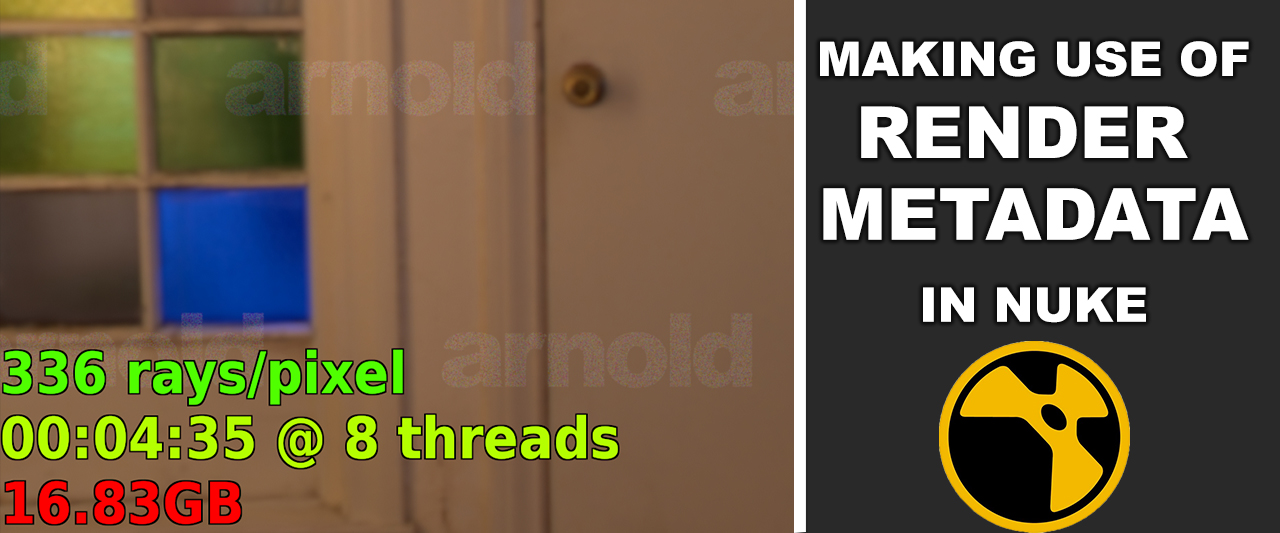
Here’s an example of Displaying useful information from a render :
(yes, you are doing something wrong, if it renders that long and takes this much RAM :))
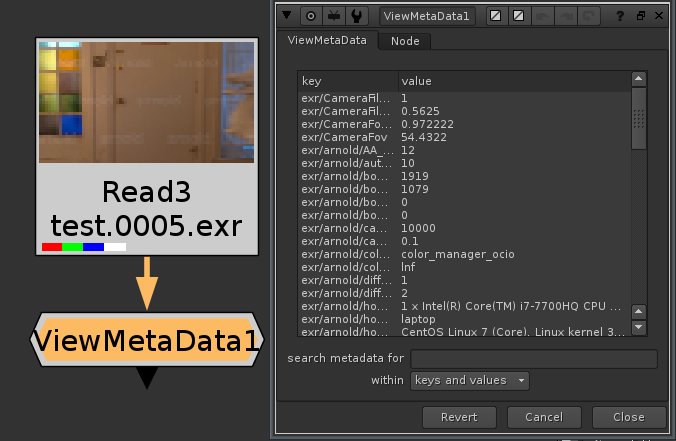
You can see the metadata of an image with the ViewMetaData node. This node displays all available metadata from your input.
Here’s an example of what a default Arnold EXR render comes with:
Quite a lot of stuff…
Metadata information is accessible in Nuke through TCL expressions which you can use in a Text Node for example. For a full list of what you can do with TCL you can refer to the documentation.
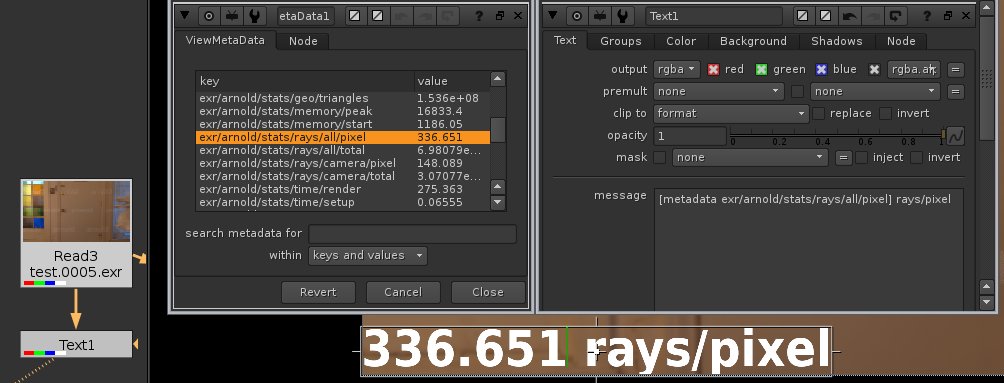
TCL expressions are evaluated in square brackets. You can access metadata with [metadata name/of/metadata]. If I want to get the average rays per pixel for example I could use [metadata exr/arnold/stats/rays/all/pixel] rays/pixel:
As this is averaging the rays of all the pixels it outputs a floating point number. We can convert it to an integer with int(). Note that whenever you want to manipulate numbers you have to enclose your mathematical operation in [expr ]:
[expr int([metadata exr/arnold/stats/rays/all/pixel])] rays/pixels
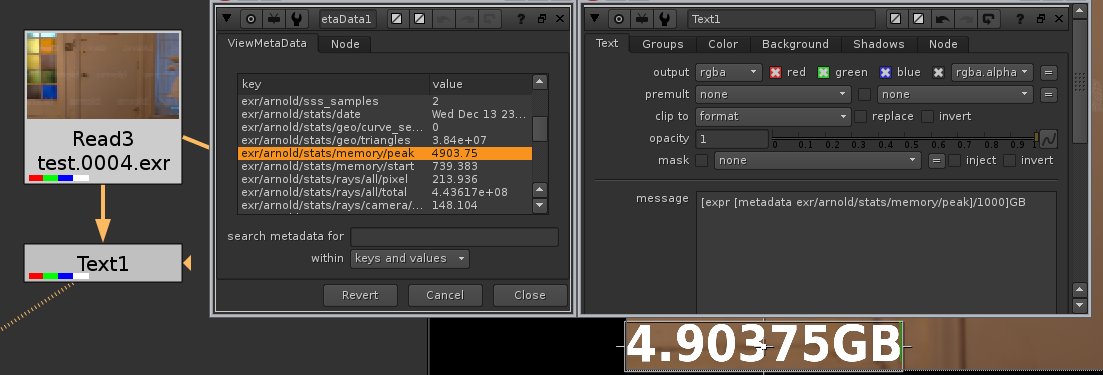
You can do the same thing to display your RAM usage. By default Arnold displays memory usage in Megabytes… Converted to Gigabytes it might be a bit more useful:
[expr [metadata exr/arnold/stats/memory/peak]/1000]GB
Just a few too many decimal places for my taste… You can use [format] similar to how it’s used in Python to change it to 2 decimal places for example:
[format “%0.2f” [expr [metadata exr/arnold/stats/memory/peak]/1000]]GB
The metadata for the render time comes in seconds with Arnold. If you’re a math genious or have very optimized renders this might work for you. Unfortunately neither applies to me, so a display in hh:mm:ss seems a bit easier to decipher :)
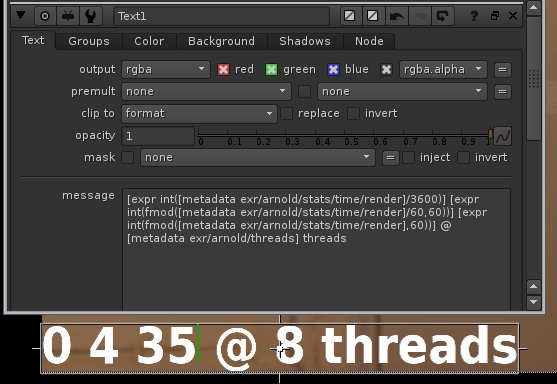
I’m using expr to convert the seconds to integers and display them in hours, minutes and seconds separately:
[expr int([metadata exr/arnold/stats/time/render]/3600)] [expr int(fmod([metadata exr/arnold/stats/time/render]/60,60))] [expr int(fmod([metadata exr/arnold/stats/time/render],60))]
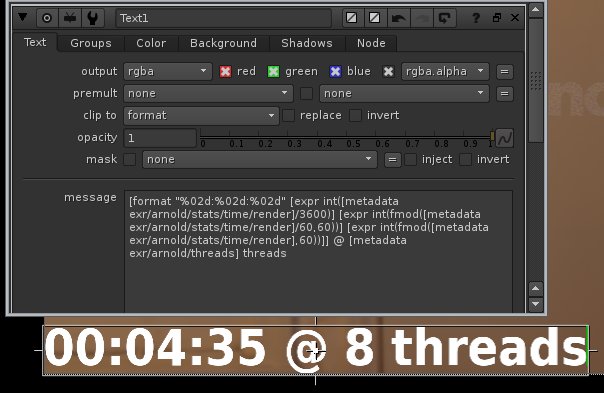
…and use [format] similar to the above example to make it nice and tidy:
[format “%02d:%02d:%02d” [expr int([metadata exr/arnold/stats/time/render]/3600)] [expr int(fmod([metadata exr/arnold/stats/time/render]/60,60))] [expr int(fmod([metadata exr/arnold/stats/time/render],60))]]
Another thing that I find useful to colorize the output. If you just have numbers whooshing by when you play an animation it’s hard to spot potential problematic frames. If you just want a simple heatmap from green to red one way you could do it is to just shift the hue of your text. Looking at a Hue ramp red has a hue of 0 and green has a hue of 0.3333:
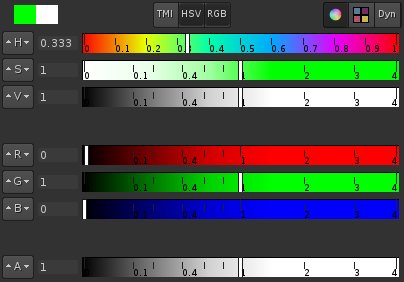
So you could put your text in HSV space and offset the red channel to shift your Hue (the hue shift in Nuke does not work properly – see HERE) and make sure you have your saturation at 1:
So all that’s left to do is to remap the numbers from whichever range you like to 0 as a maximum (red) and 0.3333 as a minimum (green). Remapping numbers can be achieved like this:
outputMin + (value – inputMin) * (outputMax – outputMin) / (inputMax – inputMin)
So if I for example would like to remap the hue of my render time in seconds to display everything with a time below 2minutes (120 seconds) in green and everything above 10 minutes (600 seconds) in red I can use:
(1/3) + ([metadata exr/arnold/stats/time/render] – 120) * (0 – (1/3)) / (600 – 120)
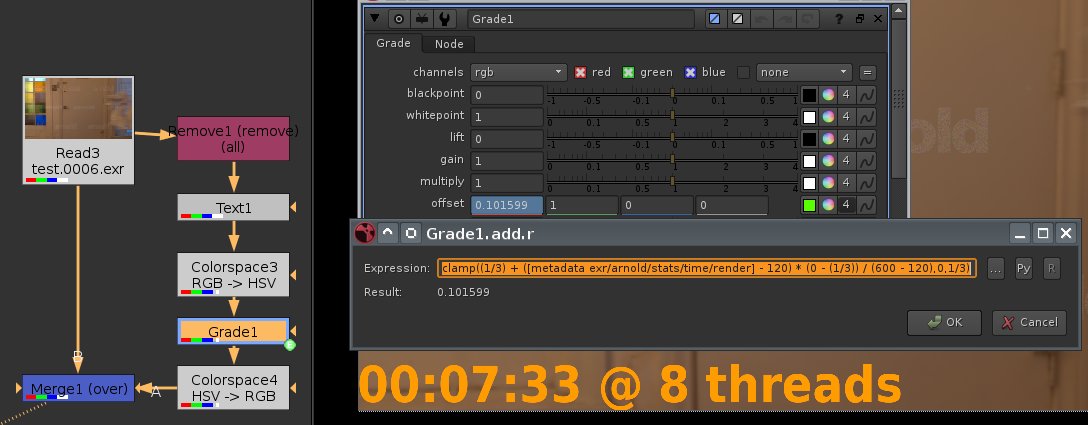
Just make sure you clamp the whole thing to 0 and 0.3333 so the values outside of this range don’t shift to another hue:
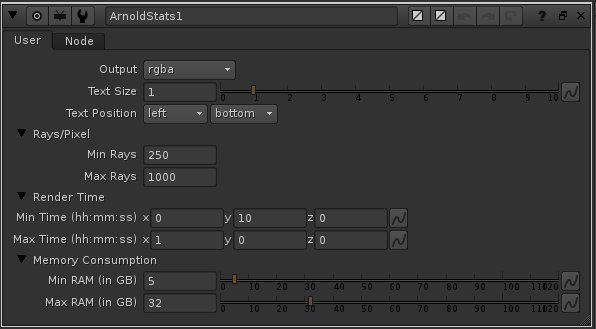
Wrap the whole thing up into a Gizmo and you are good to go… The min values specify up to which point the text will stay green and the max values specify at which point it will be completely red:
You can grab the Gizmo from this example HERE.
_________________________________________________
If this post has helped you in any way you can express your gratefulness by using the Donate Button below to buy me a coffee! :)





Comments
Thank you for sharing this! Its full of little gems!