
During the last year I luckily had some time to spend on digging a bit deeper into Katana. From working on assets and shots I experienced some moments where I thought it’d be great to have some basic tools to help get the job done just a little bit quicker. So whenever I had a bit of spare time I was developing some Macros/Gizmos/Tools to help artists on some common problems.
Katana Macro/Tool Dev from Julius Ihle on Vimeo.
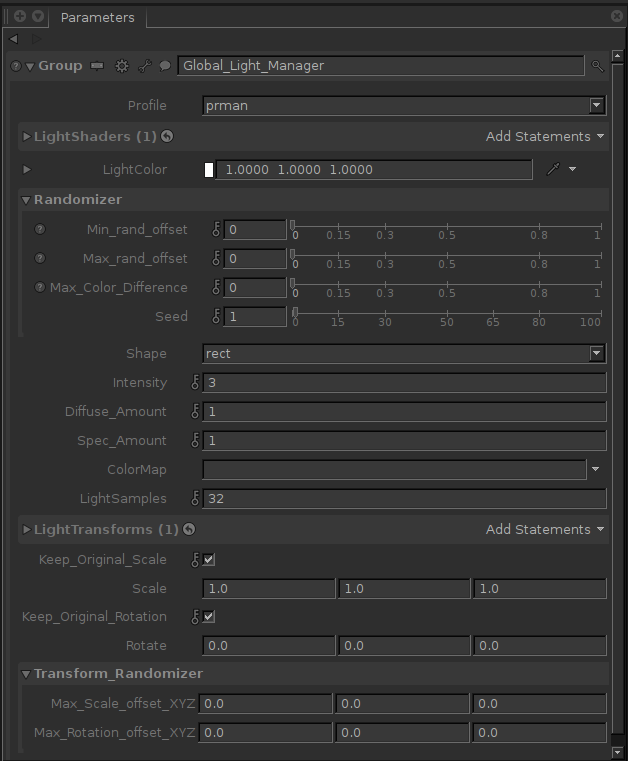
One of the tools is a macro that helps managing multiple lights. Based on a CEL you can freely modify exposed shading and transform parameters. This especially comes in handy in scenes with bigger environments that have to be lit with multiple light sources. It also features some randomization controls for lightcolor and rotation & scale.
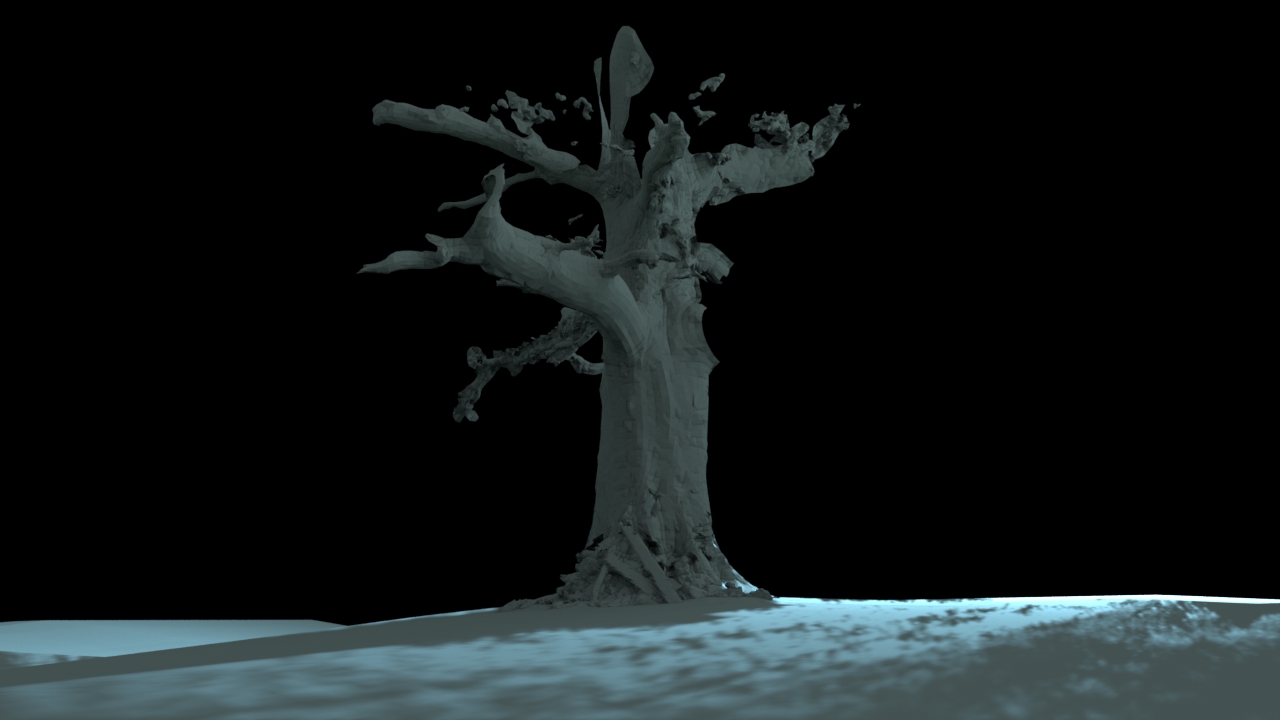
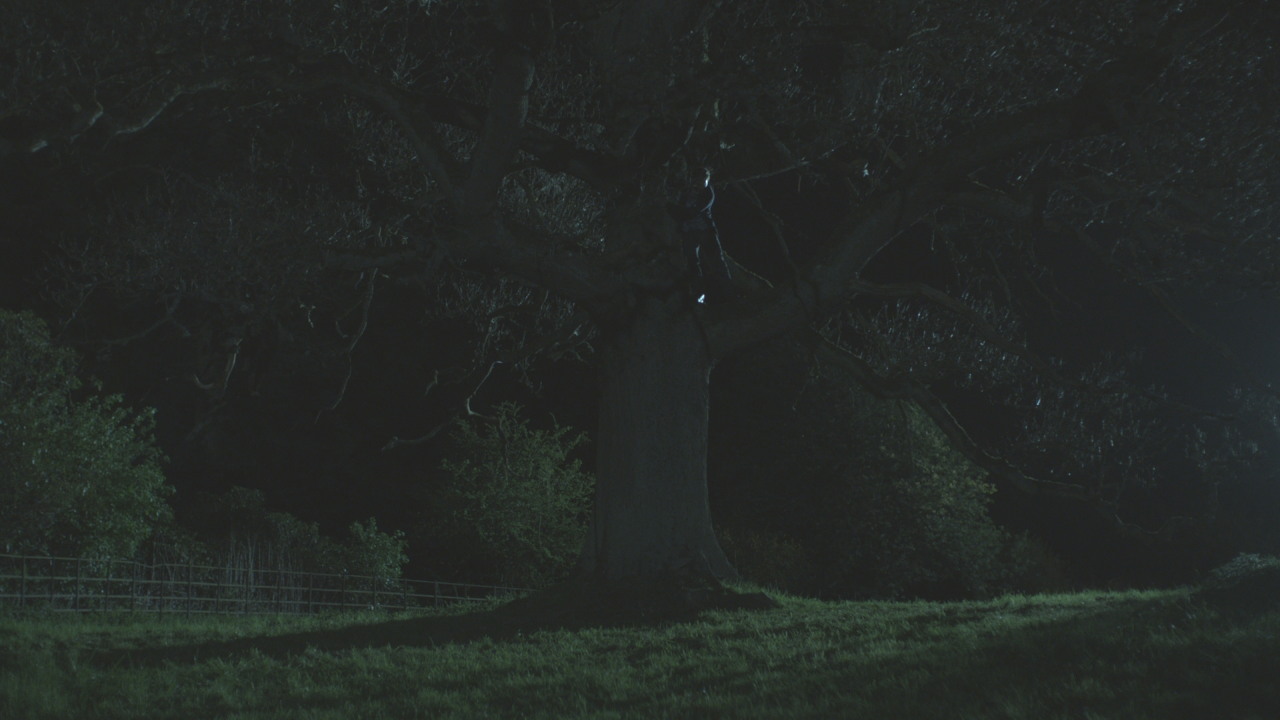
Next up we occasionally had some shots that required very accurate light cookies/gobos based on the plate. On recent shows we for example had some shots of characters walking through the woods with quite direct lighting which caused very complex noticeable shadows from the tree’s branches and leaves. In some scenes one could get away with putting just some random lightcookies as projectors (slidemaps) on the lights, but others needed a more accurate solution. This is a macro I have been working on which automates the whole process:
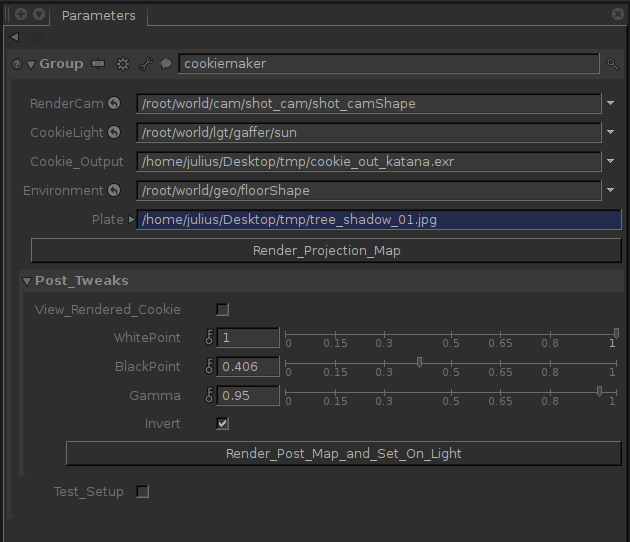 It basically works this way: You project the plate through the render camera onto the set geometry and render that result back through the light source which will should give you a proper light gobo. Now, there are usually a few things to consider, like the camera’s focal length, pre/post transformations of the plate to match the light’s scale and so on which all depends on the way the slidemap is implemented into the shader. On this one no one had to worry about it, because it’s all handled automatically :) The only drawback is that the generation of the resulting cookie involves a 2-step rendering process (projection on geo and post-tweaks) which makes it not as interactive as it could be, but luckily those renders go through really quick at least.
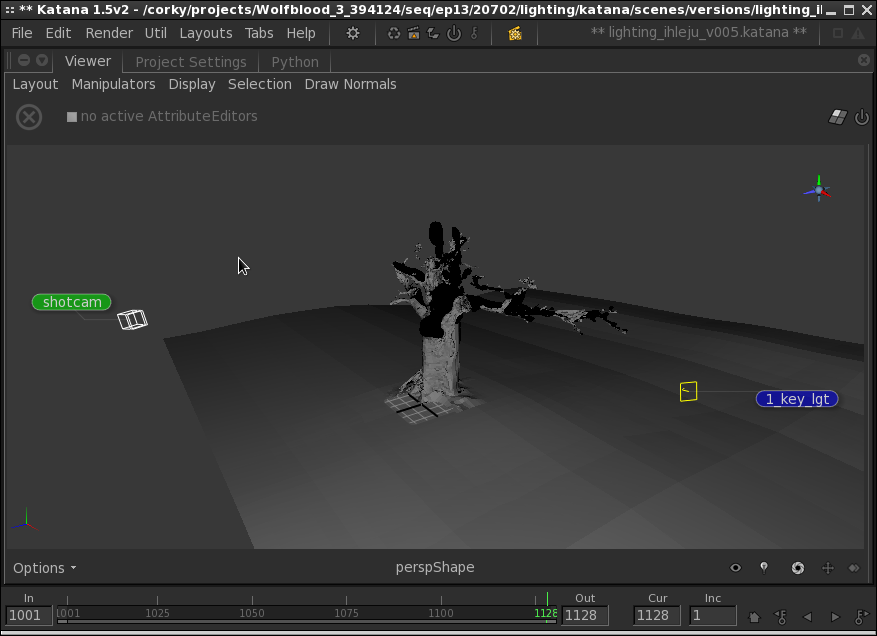
Here’s a quick run through on a previous set up which is based on the same technique, but a bit more manual and goes through Nuke. This should also work with really any setup that requires building accurate light cookies.
Say this is your light setup (in this case in Katana, but could be Maya, Houdini, or whatever):
You replicate the same thing in Nuke importing the same camera and set geometry. You project the plate through the rendercam onto the set geometry and copy over the light transformations from your 3D package into a new camera, which you then render through:
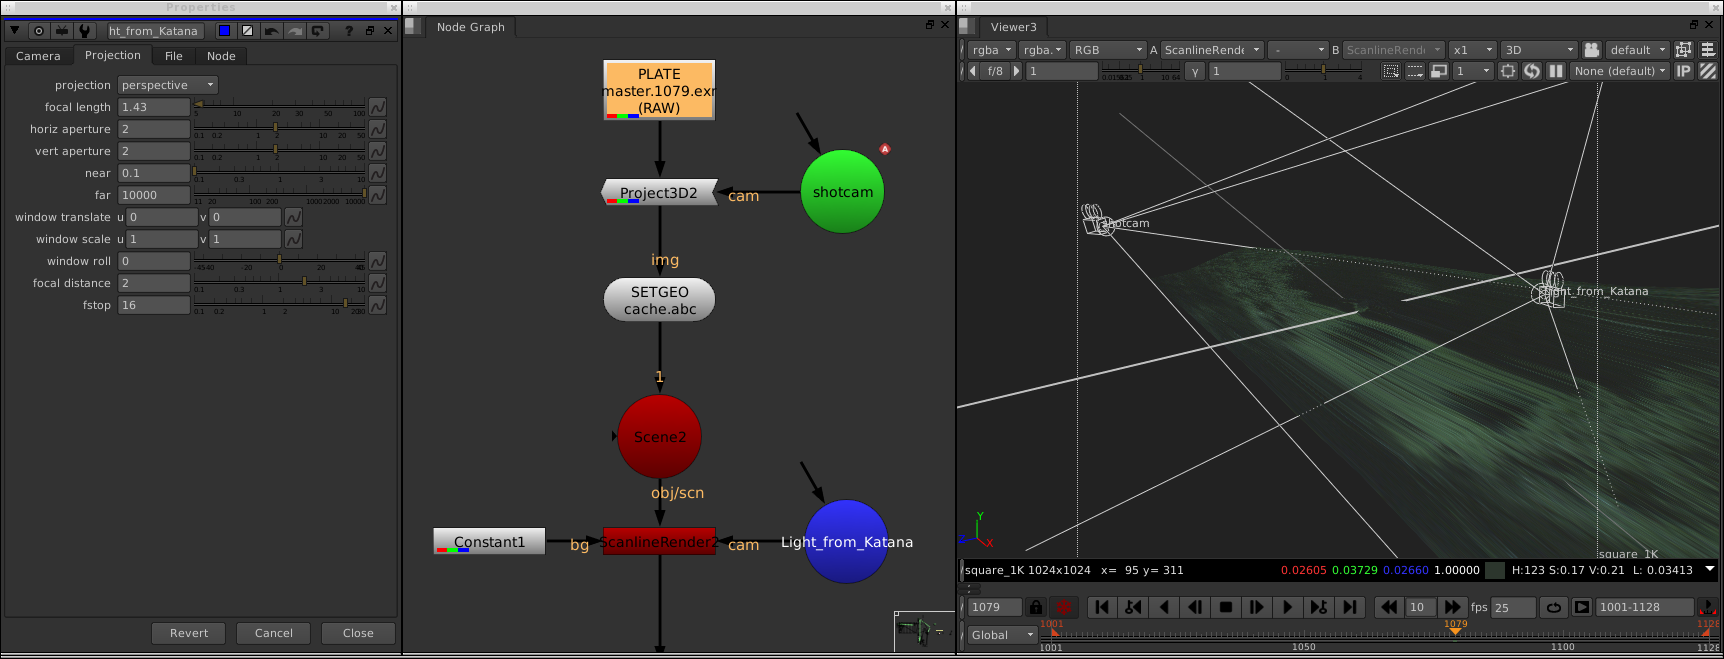
The tricky part is getting the correct settings for focal length, etc. on your camera that resembles the light, which involves a bit trial and error. You can then just desaturate the map and grade, paint and do all the fancy comp stuff to make it do what you want and then use it on your lights:
When the guys from FX do their magic and blow things up into thousands of pieces that’s always awesome. Anyone in comp is usually happy if you provide them ID’s for just about anything so, provided the FX cache contains separate geometry pieces or face-sets that’s pretty straight forward with this ID randomizer:

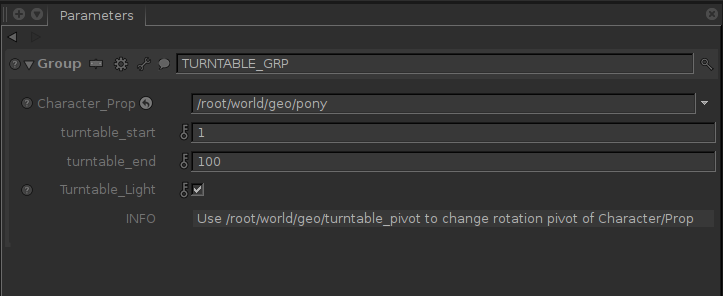
When Lookdev’ing assets it always helps to ensure some consistency between the renders. While we had templates that managed chrome- and greyballs and rendercameras, we didn’t have a setup for the turntable itself… Well, now we have:
_________________________________________________
If this post has helped you in any way you can express your gratefulness by using the Donate Button below to buy me a coffee! :)


Comments