The new RIS mode introduced in RenderMan 19 is a completely new render-engine that is very different from REYES. Being a brute force path tracer (uni- and bidirectional modes) it works much more like other renderers that follow a similar approach (e.g. Arnold). That approach aims to make the render process more simple and interactive. And while I personally don’t like it completely yet it seems to get widely adopted in the film industry and we all have to adjust to it sooner or later :)
The good thing about RIS is that it offers a much more interactive way of working. The interface and controls are much simpler now and offer easier controls to tweak your renders. However this comes at the price that compared to Reyes I have seen final rendering times increase by 3-6 times, because all the hacks are removed for a “physically plausible” workflow.
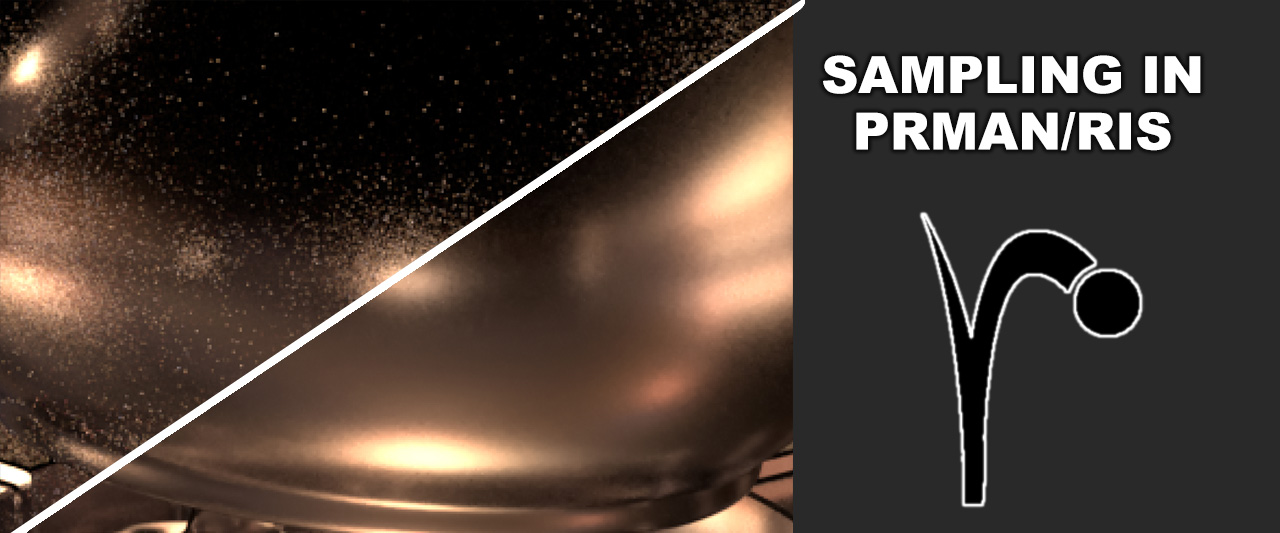
Now because there is not a lot of stuff you can tweak to squeeze rendering times it is important to understand how sampling in RIS works. RIS uses importance sampling, which in layman terms means instead of uniformly sampling an area above the hemisphere it concentrates samples around the areas that are more important (e.g. brighter, higher solid angle, etc.). Here’s a good example comparison with 2 objects – just 1 high contrast environment light importance sampled vs uniformly sampled (same number of samples):

Importance sampling is the standard sampling method in PRMan (both REYES and RIS) due to its obvious benefits.
The main settings in the render globals that control the quality of the final image are the following:
Min Samples
Max Samples
Pixel Variance
Light Samples
Bxdf Samples
Indirect Samples
The way it works is fairly straight forward: Min- and MaxSamples are a global setting for every kind of sampling in your scene (AA, Light, Shader, GI Sampling). The amount of Samples for each of those will never be higher than MaxSamples and never lower than Min Samples.
The parameter to control whether the Sampling biases towards Min or Max Samples is the Pixel Variance. Starting with Min Samples RIS will check the contrast (=noise) between the current sampling-point and those around it. If that contrast is higher than the value specified for Pixel Variance it will adaptively continue to shoot more Samples for that point until the contrast is equal or lower to the Pixel Variance (with Max Samples as a maximum). Therefore a lower Pixel Variance will increase the likelyhood of more rays being fired and therefore a better quality image (and also longer rendering time).
As noted before the problem with just using Min/MaxSamples/Pixel Variance as your global is that it affects all the Sampling in your scene. So if your shadows are grainy for example, but speculars, GI, motion blur, etc look clean, increasing the MaxSamples or reducing the Pixel Variance might give you clean shadows but also waste samples for all other sampling methods in your scene.
Therefore you also have Sampling controls for Lights, Bxdf’s and Indirect rays. Which one of them to use in a particular scenario depends on a couple of factors.
Indirect is the most obvious knob. Increasing it will spawn more indirect rays after the first bounce (=rays that cannot be directly connected back to a light source). This inhabits indirect diffuse, indirect specular (reflection/refraction) and subsurface. You can gain finer control over the sampling counts on each of these by changing the SampleMode from “bxdf” to “manual”. That way you can specify exact values for a given indirect ray type.
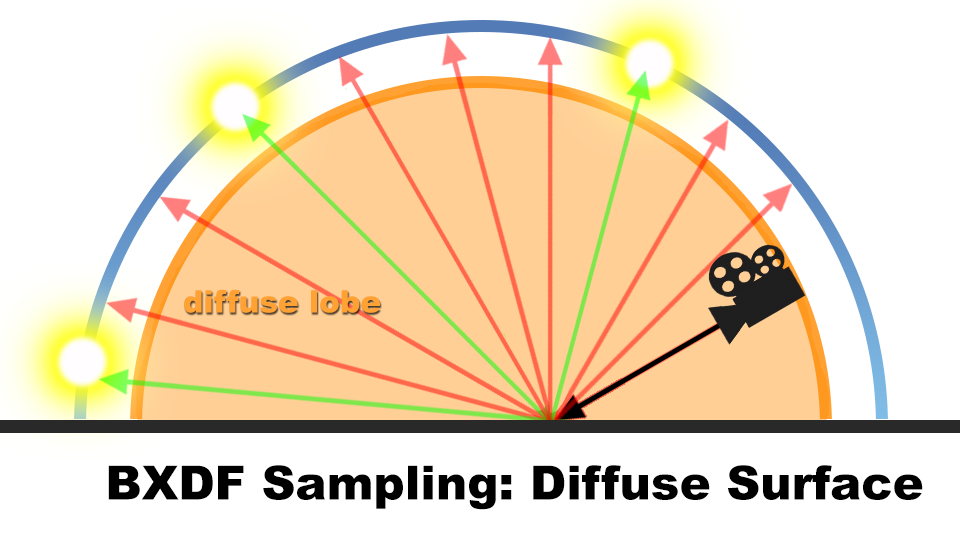
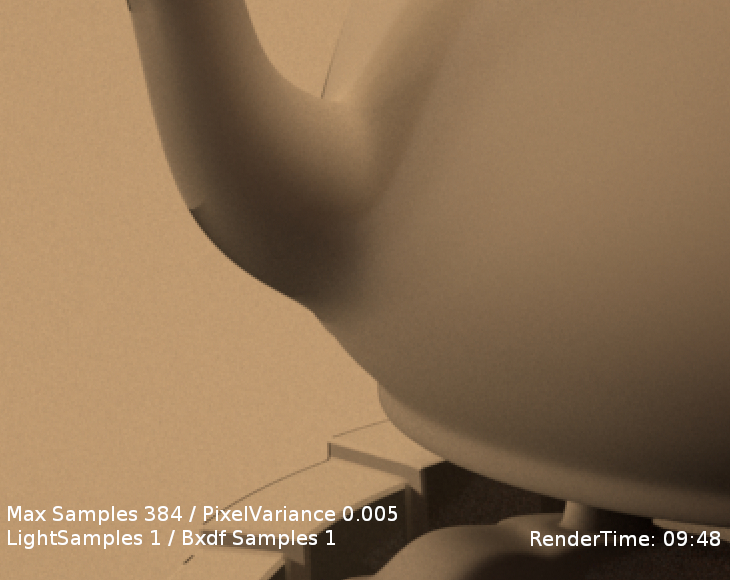
When to use LightSamples vs BxdfSamples isn’t quite as obvious at first. It depends on what kind of surface you are shading. The main indicator here is the lobe of the BXDF. Let’s say you have a plain diffuse material. Increasing the Bxdf samples in that case won’t benefit you much, because a diffuse surface naturally has a very wide lobe. That way increasing the sampling on the Shader will result in a lot of wasted samples:

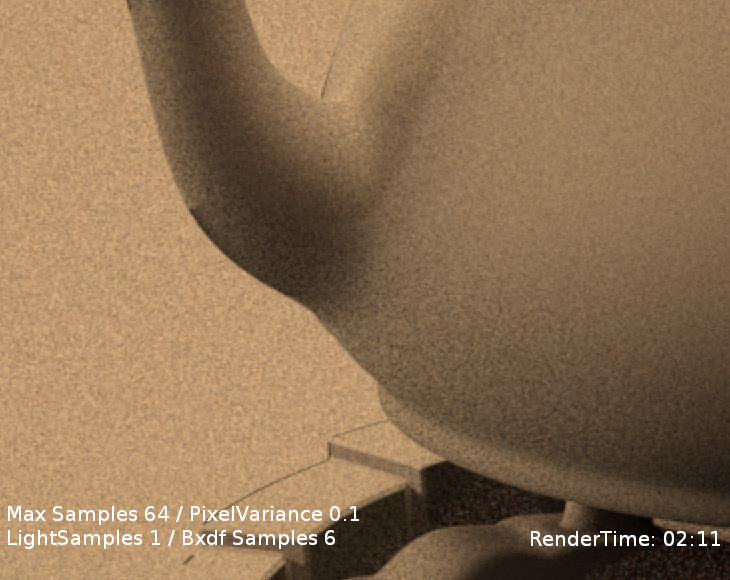
Note that all the renders are scaled up crops to better show the sampling problems.
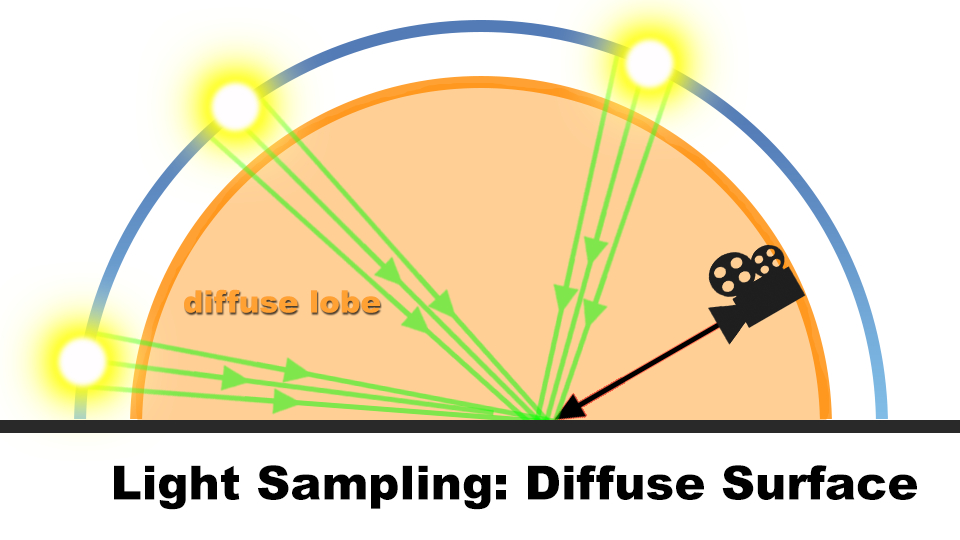
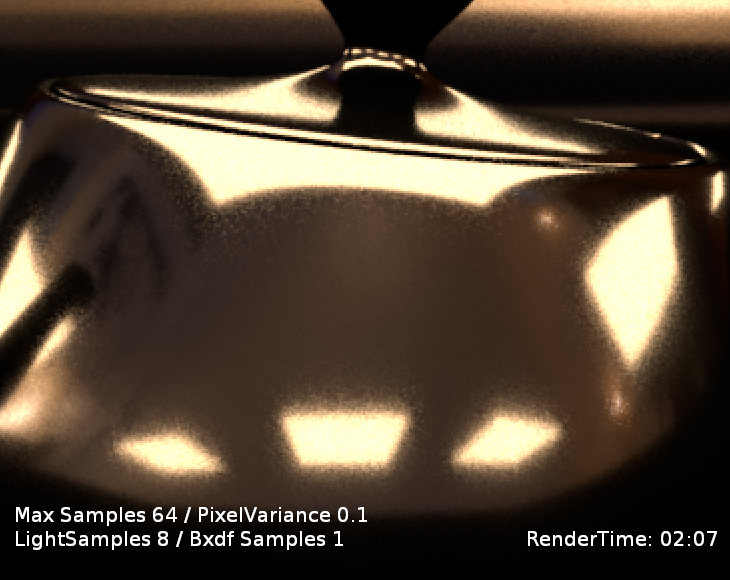
However if you are using Light-Sampling things get a lot more efficient as you are now shifting the importance towards the lights:

In comparison to get a similarly clean image by solely adjusting the Min/MaxSamples and PixelVariance and leaving LightSamples at its default of 1 you will waste a lot of rendertime to get the same result:
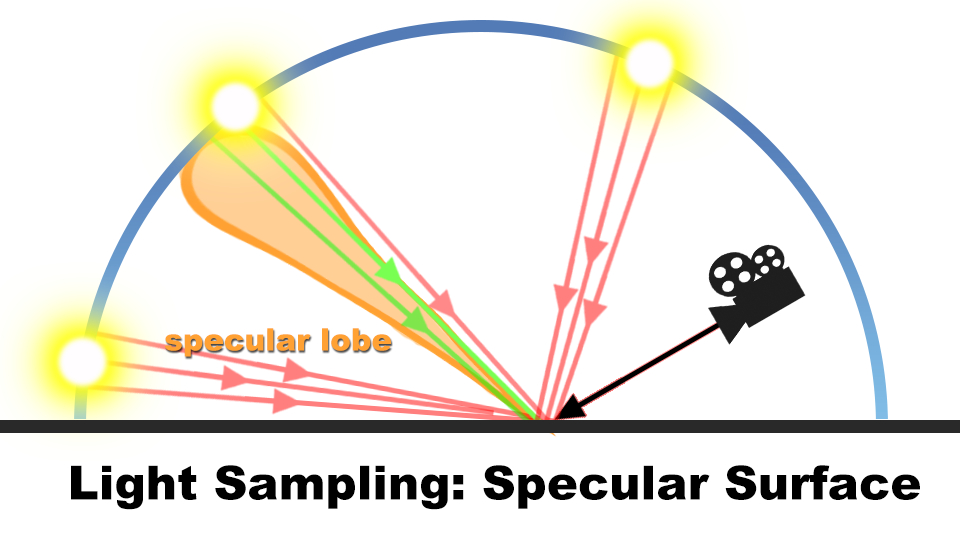
As you might have guessed for direct specular shading that has a very tight lobe (=more mirror-like) it works the exact opposite. Because the lobe is so narrow adjusting light Samples globally will most likely not reduce noise as it’s very unlikely for all the lights to have an effect on the given point of shading:

…increasing the Bxdf Samples however is way more efficient:


And once again, just using Min/MaxSamples and PixelVariance to adjust the quality wastes more time than needed:

Now, what about rough speculars? Often times reflections are having a broader lobe which sits somewhere inbetween that of a rather mirror-like specular and a diffuse lobe. In that case you have to mix between Light- and Bxdf Samples. Due to RIS taking advantage of multiple importance sampling it tries to automatically allocate samples that make the most sense for the current shadingpoint. But as a general rule of thumb I personally found that for a roughness of ~30% using the same value for Light- and Bxdf Samples gives a good starting point. If the spec gets more shiny you bias towards Bxdf Sampling and if it gets rougher you bias towards Light Sampling.
Once the direct light components are noise-free, indirect noise tends to be a bit harder to tackle as this will be the main source of noise most of the time. Often times unfortunately adjusting Indirect Samples will only get you so far until render times start to explode:

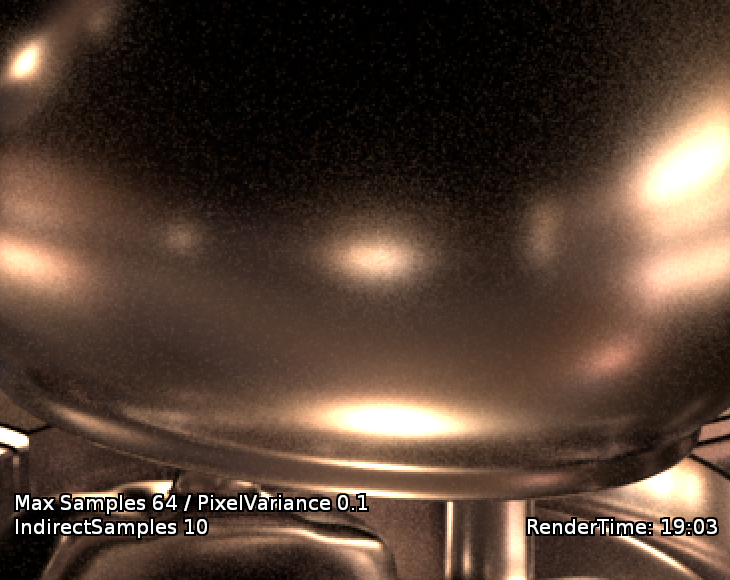
The MaxSpecularDepth in this scene and on the objects is 4. As you can see even with 10 indirect samples the render isn’t really as smooth as it should be. Luckily you have 2 more options that can help eliminate noise. Clamp Depth and Clamp Luminance. Sampling Fireflies usually happen when there is a big contrast between higher and lower luminance sampling points. The clamp controls try to get rid of those brighter samples to reduce the noise. If you for example set the clamp depth to 2 and the clamp luminance to 1 it means that starting from the 2nd bounce of the light path (be it diffuse, specular or subsurface) the sample intensity will be clamped to 1, meaning no samples at this depth have a higher value than the one specified in the clamp luminance:
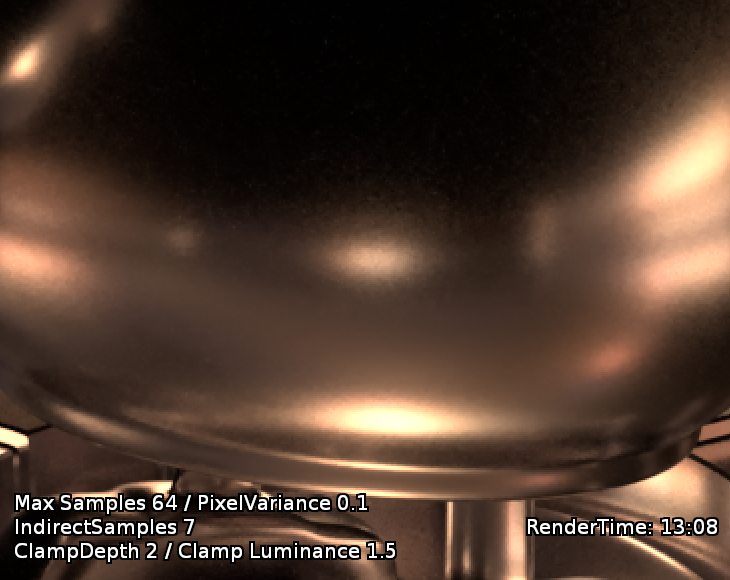
As you can see the resulting image is much cleaner. I was even able to reduce the indirect samples and still get a cleaner result and lower rendering time. However you also have to be careful to not set your clamp luminance too low as this might produce too washed-out-looking bounces.
You can also control indirect sampling through the Roulette Depth/Threshold Control. This will randomly terminate a percentage of samples (threshold) at a given depth. The default values of 4 for roulette depth and 0.2 for roulette threshold means that starting at the 4th bounce of light 20% of the samples will randomly be terminated. This control is useful if you have a lot of light bounces and want to get rid of unneccesserely low-importance samples at larger depths. And while it reduces render times nicely it also reduces quality at the same time, so those controls should be used with caution.
As a general workflow what personally worked best for me is to usually
1) Adjust Min-/MaxSamples and PixelVariance until I get clean Anti-Aliasing and motion blur (..and DOF).
2) Check the diffuse_direct AOV for noise and increase Light Samples if needed
3) Check the specular_direct AOV for noise and balance between increasing Bxdf/Light samples Samples if needed (depending on spec roughness)
4) Check diffuse_indirect, specular_indirect and subsurface and increase indirect Samples as needed
5) Try to play with Roulette Depth/Threshold & Clamp Depth/Luminance to eliminate fireflies
I always try to not go higher than needed with Min-/MaxSamples and PixelVariance. They tend to be the most sensitive control and increase render times the most.
Also often times globally adjusting a sampling type may be excessive when only one light/surface produces noise. For lights you can adjust samples individually, which is quite cool if you have a scene with lots of lights but only the shadows from your keylight are noisy for example. Unfortunately individual sampling controls for controlling the sampling on shaders are not exposed in the out-of-the-box pixar shaders, so unless you create your own you have to adjust Bxdf samples globally.
_________________________________________________
If this post has helped you in any way you can express your gratefulness by using the Donate Button below to buy me a coffee! :)


Comments
Hello, I’m learning Renderman, coming from Arnold. Thank’s for the tips, very useful. Clamping luminance save me a lot of time in my renders.
Cheers.
Great. Thank you for the lesson. I hope you make a few more ;) covering real world scenarios with lots of geometry and GI.